2.17.2012

Shadow Box Clock

DSCN3374

So, I seem to be back on top of things...for a week at least! =) This isn't the only thing suffering. My poor English class hasn't met (officially) in weeks! Last night I was texted by one student asking if we were ever going to get past this particular section in the book! Then with the worst English he could muster proclaimed that he was getting badder in English! Oh my!

Anyway! Let's get to the real reason of the post! I am so excited to share this with you guys! I love, love, LOVE how these turned out! I was looking for a creative craft to make for the parents of my kiddos. The theme of the gifts is always an easy task to come up with...um, the kids! The actual gift is not so easy. I found this on Pinterest and decided I love the idea. But I didn't want to plaster one picture on the face and call it quits...I never go easy!

Then I found this idea while doing some other research one day...again, loved the idea but not the set up! I could feel the idea forming I just couldn't picture it!

Finally, one day while spending some time with an awesome Aunt, we headed to my new favorite store and there it was. Perfection! A shadow box ringing in at $9! Oh yeah in a big way!
So I grabbed 2 and got to work!

First order of business was getting the kiddos to cooperate...um, no small task, in case you were wondering! =)You get a lot, I mean, A LOT of pictures like these!
DSCN3288
DSCN3272
DSCN3326
DSCN3303
Then in the hundreds thousands of shots fired you discover that your children are capable of sitting still, holding a piece of paper, and looking cute!
DSCN3341
DSCN3292


DSCN3264

*Disclaimer* There are no pictures of the process! While I was doing it I was fearing greatly that it wasn't going to turn out! Low and behold, fabulous idea, flawless execution, and failure photography!**

After shoving some food in them and throwing them in the bed I got to work!

Because I don't do tools (well) I had my dad drill the back of the shadow box for me! Measure from all four corners and X marks the spot!

I used the clock stem to size up the drill bits. I found one that fit snugly and neatly! Dad drilled it and I began reassembly!

Because most shadow boxes are backed with Styrofoam all that took was a puncture with the clock stem. That way I assured that it would be that perfect size!

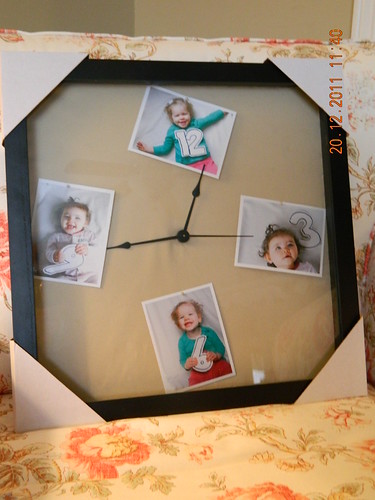
I slit the fabric backing and tucked in the edges around the click stem so it looked neat! Then I got to pinning the pictures with the straight pins from the shadow box! Awesome! Easy! and Fun!

Notes on the clock kit: I purchased the clock kit at Hobby Lobby! They have an awesome variety of clock making kits. I chose the simple kit and purchased additional hands because I didn't really like the ones that came with it! If you time it right they go on sale occasionally for %50 off so you can knock out what you need for around $5!

The only other things you need will be:

a. the straight pin if you don't like the ones that come with it! I entertained the idea of silver flat head straight pins but after putting in the straight pins I loved the way it looked!

b. material backing if you don't like what comes with it. I thought about scrapbook paper and I am thinking I may go that route next time! For these clocks I LOVE the simplicty but I have some other ideas and I may go with the scrapbook feel next time!

c. photo paper and ink! duh!

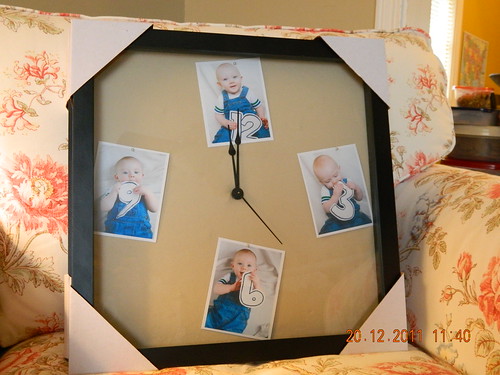
And the finished product!

DSCN3375


DSCN3374
There are about a gazillion different ways you could go with it! I thought about adding a typed up verse to the back for about 20 seconds. I didn't like the way it looked and took it down but I'm sure it would look cool to make it with a verse!
Have fun making it yours! Be sure to link back when you create you masterpiece! I would love to see them!

No comments:

Post a Comment